There’s something irresistibly comforting about a dessert that feels like a warm hug, and banana pudding has long held that cherished spot in the hearts of sweet lovers everywhere. If your searching for a luscious treat that effortlessly balances creamy richness with the natural sweetness of ripe bananas, look no further. In this article, we’ll guide you through whipping up a simple and dreamy banana pudding that transforms everyday ingredients into a blissful indulgence. Prepare to delight your taste buds and impress your friends with a timeless classic made easy-because sometimes, the sweetest moments come from the simplest recipes.
Whipping Up the Perfect Creamy Banana Pudding Base
Whip up this simple & creamy banana pudding bliss starting with a luscious, velvety base that melts on your tongue. The secret lies in balancing luscious creaminess with just the right hint of vanilla and eggy richness, giving each spoonful a decadent, dreamy texture. Whether you’re reliving a cherished Southern classic or craving a comforting homemade treat,this banana pudding will quickly become your go-to dessert for any occasion.
Choosing the Best Bananas and Ingredients for ultimate Flavor
Start with ripe bananas featuring golden skins speckled with brown spots-these are the sweetest and most flavorful, perfect for a rich pudding experience. Overripe bananas will make your pudding too mushy, while underripe ones lack the signature sweetness. For the pudding base, opt for whole milk or half-and-half to create a rich mouthfeel, and use fresh eggs for that silky custard texture. Vanilla extract should be pure, as this is where much of your pudding’s aroma will shine. Combining these essentials will guarantee that restorative, creamy comfort we crave in banana pudding.
Layering Techniques to Elevate Your Banana pudding Experience
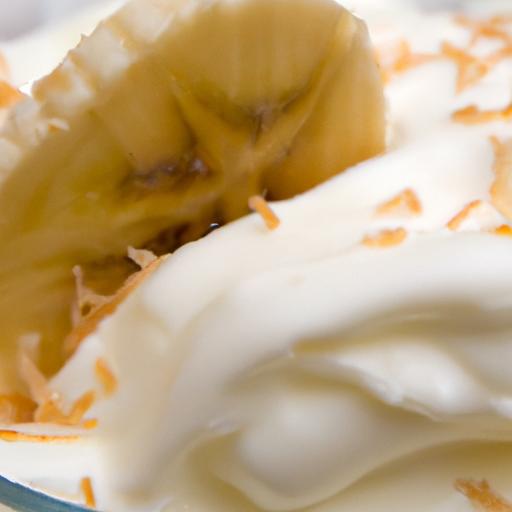
Layering is an art form here-starting with a thin layer of the creamy banana pudding base,followed by a bed of soft but sturdy vanilla wafer cookies. Next comes a generous scatter of sliced bananas, each piece testament to fresh flavor.Alternate these layers, finishing with a thick layer of pudding crowned by whipped cream or meringue. Allowing the pudding to rest for a few hours lets the vanilla wafers absorb the custard,creating a harmonious texture that’s both tender and luscious. This layering elevates every bite, balancing sweetness, creaminess, and delicate crunch.
Tips for Serving and Storing Your banana Pudding Bliss
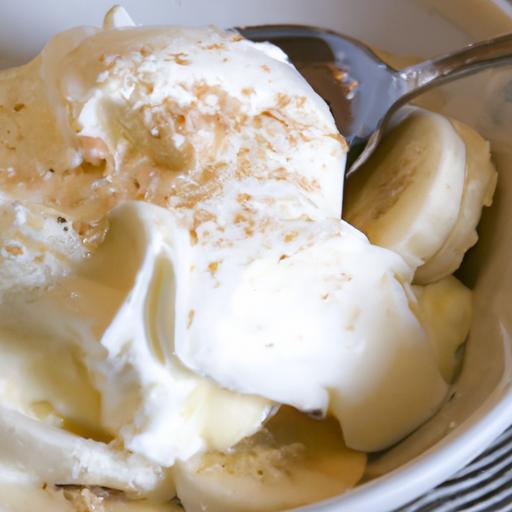
For maximum delight,serve your banana pudding chilled so the flavors meld beautifully and the custard firms up just right. Garnish with a sprinkle of crushed vanilla wafers or a few banana slices for visual appeal. Leftovers keep well when tightly covered in the refrigerator, lasting up to 3 days. Avoid freezing, as the pudding’s texture can break down.When serving leftovers, give the pudding a gentle stir and top with fresh garnishes to refresh its allure.
Prep and Cook Time
- Readiness: 15 minutes
- Cooking: 20 minutes
- Chilling: 2-3 hours
Yield
Serves 6-8 comfortably, perfect for family gatherings or afternoon indulgence.
Difficulty Level
Easy – beginner-pleasant with straightforward techniques.
Ingredients
- 3/4 cup granulated sugar
- 1/3 cup all-purpose flour
- 1/4 teaspoon salt
- 2 1/2 cups whole milk
- 3 large egg yolks, lightly beaten
- 2 teaspoons pure vanilla extract
- 4 ripe bananas, sliced thinly
- 1 (12-ounce) box vanilla wafer cookies
- 1 cup heavy whipping cream (for garnish)
- 2 tablespoons powdered sugar (optional, for whipped cream)
Instructions
- Combine dry ingredients: In a medium saucepan, whisk together sugar, flour, and salt until well blended.
- Add milk and cook: gradually whisk in milk over medium heat, stirring constantly until mixture thickens and begins to bubble gently, about 8-10 minutes.
- Temper egg yolks: Slowly whisk about 1 cup of the hot milk mixture into the beaten egg yolks to warm them,then return the yolk mixture to the saucepan.
- Cook custard: Continue cooking, stirring constantly, for 2 more minutes until custard thickens further and coats the back of a spoon.
- remove from heat and add vanilla: Stir in vanilla extract, then set pudding aside to cool slightly.
- Layer the pudding: In a glass dish or individual serving cups, begin layering: start with a spoonful of pudding, then add a layer of vanilla wafers, followed by a layer of banana slices. Repeat layers until dish is filled, ending with pudding on top.
- Whip cream for topping: In a chilled bowl, whip heavy cream and powdered sugar (if using) until soft peaks form.
- Top and chill: spread whipped cream over the final layer of pudding and refrigerate for at least 2 hours to set and allow the wafers to soften.
- Serve: Garnish with crushed wafers or extra banana slices just before serving for added texture and visual appeal.
Chef’s Notes: Tips for Success
- Choosing bananas: The ideal banana has shining yellow skin with plenty of brown spots for maximum sweetness and softness.
- Texture tips: don’t rush the pudding base – constant stirring prevents lumps and ensures a smooth finish.
- Make-ahead: Assemble pudding a day in advance and let chill overnight for even more developed flavors and improved texture.
- substitutions: Use coconut milk or almond milk for a dairy-free version; adjust sweetness accordingly.
- Storage: Cover tightly and store in the refrigerator up to 3 days. Fresh bananas may brown; adding lemon juice slices before layering can help maintain color.
Serving Suggestions
Serve chilled in clear glass bowls or delicate trifle glasses to showcase the beautiful layers of creamy pudding, tender bananas, and golden wafers. Garnish with toasted coconut flakes, a dusting of ground cinnamon, or even crushed chocolate chips to add a decadent twist. A sprig of fresh mint or edible flowers can bring a refreshing contrast and elevate the presentation for special occasions.
| nutrient | Per Serving |
|---|---|
| Calories | 280 |
| Protein | 4g |
| Carbohydrates | 45g |
| fat | 7g |
Explore more delightful banana pudding variations to expand your dessert repertoire.
For deeper insights into selecting fresh produce, visit the USDA Food Safety and Inspection Service.

Q&A
Q&A: Whip Up This Simple & Creamy Banana Pudding Bliss
Q1: What makes this banana pudding recipe stand out from the rest?
A1: This banana pudding bliss combines ultra-creamy textures with a straightforward, no-fuss approach. Unlike conventional recipes that require hours to chill or multiple steps, this one is streamlined for maximum flavor with minimal effort-perfect for both dessert novices and seasoned sweet-lovers.
Q2: Can I use any type of banana for this pudding?
A2: Absolutely! Ripe bananas bring the best natural sweetness and creaminess, turning your pudding into a luscious delight. Just make sure they’re ripe but not overly mushy-think sweet and fragrant, with a touch of firmness to hold thier shape.
Q3: Is this banana pudding suitable for dietary restrictions?
A3: This recipe is incredibly adaptable! You can easily swap dairy milk for almond, oat, or coconut milk and use plant-based whipped cream to make it vegan. For gluten-free, simply use gluten-free cookies or wafers if your recipe calls for them. The creamy bliss can be inclusive for nearly everyone!
Q4: How can I achieve that perfect creamy texture every time?
A4: The secret is in balancing smooth pudding mix or custard with fresh ingredients and gentle folding. Whisk thoroughly to avoid lumps and chill sufficiently to let everything meld harmoniously. Using ripe bananas and a quality cream component-whether heavy cream, cream cheese, or whipped topping-ensures that silky finish.Q5: Are there fun twists I can try to elevate this banana pudding?
A5: Of course! Sprinkle chopped nuts or toasted coconut on top for crunch, swirl in a caramel or chocolate drizzle for extra decadence, or layer slices of strawberries or berries for vibrant color and tartness. The sky’s the limit when it comes to personalizing your blissful banana pudding!
Q6: How long dose this pudding keep in the fridge?
A6: Banana pudding is best enjoyed within 2-3 days. The bananas may start to brown and the texture can shift, but if stored properly in an airtight container, it should maintain its creamy delight for a short, sweet window.
Q7: Can I make this banana pudding ahead of time for a party?
A7: Yes! In fact, making it a few hours ahead-or even the night before-allows flavors to meld beautifully. Just add fresh banana slices or garnish right before serving to keep that fresh look and taste.
Q8: What’s the best way to serve this dessert?
A8: Serve it chilled in individual clear glass cups to show off the creamy layers and banana slices. Garnish with a sprig of mint,a dusting of cinnamon or nutmeg,or a crispy wafer on the side to create a visually inviting and deliciously satisfying treat.
Now that you’re armed with these tips and insights, get ready to whip up your own simple and creamy banana pudding bliss-your taste buds will thank you!
The Way Forward
As you savor the last spoonful of this simple and creamy banana pudding bliss, let yourself appreciate how effortlessly humble ingredients can transform into a comforting dessert that feels like a warm embrace. Whether enjoyed as a quick treat or a show-stopping finale to a gathering, this pudding invites you to indulge in its silky layers and nostalgic flavors. So next time you’re craving something sweet and satisfying, remember: a little banana, a touch of creaminess, and a sprinkle of love are all you need to whip up a dessert that’s truly blissful.