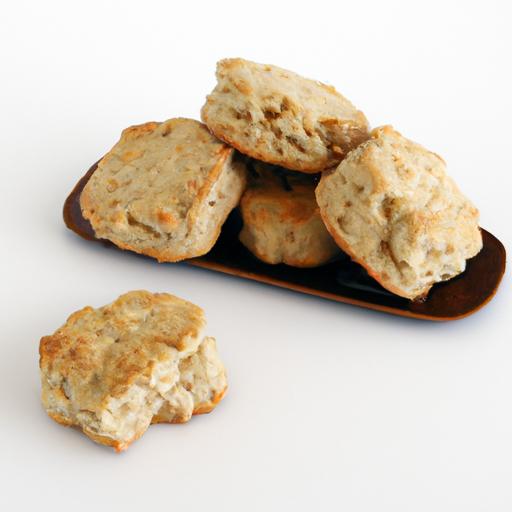
There’s something undeniably comforting about biting into a warm, buttery biscuit-it’s flaky layers melting effortlessly on the tongue, each crumb bursting with flavor and texture. But for those navigating the world of gluten-free baking, achieving that perfect crispness and taste can feel like an elusive dream. Enter “Crisp & Tasty: The Ultimate Guide to Gluten-Free Biscuits”, your go-to companion for mastering biscuits that don’t just accommodate dietary needs but celebrate them. In this guide,we’ll unravel the secrets behind creating irresistibly crisp,tender,and flavorful gluten-free biscuits that prove you don’t have to compromise on taste or texture. Whether you’re a seasoned baker or just beginning your gluten-free journey,prepare to transform simple ingredients into golden delights that everyone at the table will love.
Crisp & Tasty gluten-free biscuits deliver the perfect marriage of tender crumb and golden crust,proving you never have to compromise on flavor or texture. From the heartwarming southern classics to modern gluten-free kitchens, these biscuits carry a legacy of comfort and festivity. After years of culinary exploration and dozens of batch tests, I’m excited to share how expertly chosen gluten-free flours and baking techniques come together to elevate your biscuit game to irresistible heights.
Prep and Cook Time
- Preparation: 15 minutes
- Cooking: 12-15 minutes
- Total Time: 30 minutes
Yield
Makes about 10 medium-sized biscuits
Difficulty Level
Easy to Medium – Ideal for bakers familiar with gluten-free baking basics but also approachable for adventurous beginners.
Ingredients
- 1 ½ cups gluten-free all-purpose flour (ensure it contains xanthan gum; if not, add 1 tsp separately)
- ½ cup almond flour (for moisture and subtle nutty flavor)
- 1 tablespoon baking powder (gluten-free, double-checked!)
- 1 teaspoon baking soda
- 1 teaspoon kosher salt
- 3 tablespoons cold unsalted butter (cut into small cubes)
- 1 cup buttermilk (or dairy-free milk with 1 tbsp lemon juice, let sit 5 minutes)
- 1 teaspoon apple cider vinegar (helps tenderize and activate baking soda)
- 1 tablespoon honey (optional, for slight sweetness)
instructions
- Preheat your oven to 425°F (220°C) and line a baking sheet with parchment paper for easy cleanup and even baking.
- In a large bowl, whisk together the gluten-free all-purpose flour, almond flour, baking powder, baking soda, and salt until well combined.
- Cut in the cold butter using a pastry cutter or your fingertips until the mixture resembles coarse crumbs with some pea-sized pieces remaining; this creates pockets of buttery flakiness.
- In a separate bowl, combine the buttermilk, apple cider vinegar, and honey (if using). Stir well and let it rest for 2 minutes until it thickens slightly.
- Pour the wet ingredients into the dry ingredients, gently folding with a spatula or wooden spoon until the dough just comes together – avoid overmixing to keep biscuits tender.
- Transfer the dough onto a generously floured surface (use gluten-free flour). Pat the dough into a roughly 1-inch thick rectangle.
- use a floured biscuit cutter (about 2.5 inches) or a glass rim to cut out biscuits, pressing straight down without twisting to maximize rise.
- Place biscuits on the prepared baking sheet about 1 inch apart for crisp edges; closer for softer sides.
- For an extra golden top, brush the biscuits lightly with milk or melted butter before baking.
- Bake for 12-15 minutes, until tops are golden and edges crisp, rotating halfway through for even browning.
- Remove from oven and let cool for 5 minutes before serving to finish setting.
Tips for Success
- Flour blend matters: Combining almond flour with a quality gluten-free all-purpose blend adds moisture and flavor,balancing the dryness common with many gluten-free flours.
- Cold butter is your golden ticket: Keep butter chilled and handle minimally to create flaky layers.
- Don’t skip acid: The apple cider vinegar reacts with baking soda to give the biscuits a gentle lift and tender crumb.
- Keep dough cool: Warm dough can lead to tough biscuits-work quickly and chill briefly if needed.
- make ahead: Dough can be refrigerated for 24 hours. Bake straight from fridge, adding a couple of extra minutes to baking time.
- Gluten-free flours vary: Adjust liquids slightly if your blend feels dry or wet; aim for a soft but not sticky dough.
Serving Suggestions
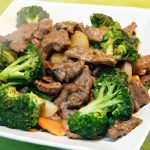
these Crisp & Tasty gluten-free biscuits shine as a companion to savory dishes like hearty stews, creamy mushroom gravy, or classic scrambled eggs. For a decadent twist, slice warm biscuits in half and slather with butter and local honey. Garnish with fresh herbs like thyme or chives for colour and an aromatic finish. For brunch, try a dollop of homemade strawberry jam or a smear of whipped ricotta for a delightful contrast in textures. thier golden crust and tender interiors also make them the perfect vehicle for breakfast sandwiches or a simple pat of whipped honey butter.

Nutritional Information (per biscuit)
| Calories | Protein | carbohydrates | Fat |
|---|---|---|---|
| 180 kcal | 4 g | 22 g | 8 g |
For further inspiration, explore our Complete Guide to Gluten-Free Baking and understand the science behind flour blends. For a deeper dive into gluten-free flours and their nutritional profiles, check out this extensive resource at Gluten Free Watchdog.
Q&A
Q&A: Crisp & Tasty – The ultimate Guide to Gluten-Free Biscuits
Q1: What makes gluten-free biscuits different from conventional biscuits?
A1: Gluten-free biscuits swap out wheat flour for option flours like rice, almond, or tapioca, which naturally lack gluten. This change impacts texture and flavor, so the challenge is crafting biscuits that are just as flaky and tender without that familiar elastic protein.
Q2: Can gluten-free biscuits be as crisp and fluffy as their gluten-packed counterparts?
A2: Absolutely! With the right combination of flours, leavening agents, and fats, gluten-free biscuits can achieve that coveted crisp exterior and melt-in-your-mouth fluffiness. The secret lies in balancing moisture and using binders like xanthan gum or psyllium husk to mimic gluten’s structure.
Q3: What are the best flours to use for gluten-free biscuits?
A3: A blend is key! Rice flour offers a neutral base, almond flour adds richness and moisture, and tapioca starch provides stretchiness.Some bakers also incorporate oat flour (certified gluten-free) or sorghum to enhance flavor and texture. Experimenting with blends helps you find your perfect biscuit formula.
Q4: How does one prevent gluten-free biscuits from turning out crumbly or dense?
A4: Overworking the dough is a common culprit. Handle it gently, just until ingredients combine. Also, precise measurements matter-too much flour can dry out biscuits, while too little won’t hold them together. Incorporating a bit of fat (like butter) and an egg or flax egg can increase tenderness and cohesion.
Q5: Are gluten-free biscuits suitable for people without gluten intolerance?
A5: definitely! Gluten-free biscuits can delight anyone’s palate. They often offer unique flavors and a lighter feel, making them a tasty alternative whether you have dietary restrictions or simply want to try something new.
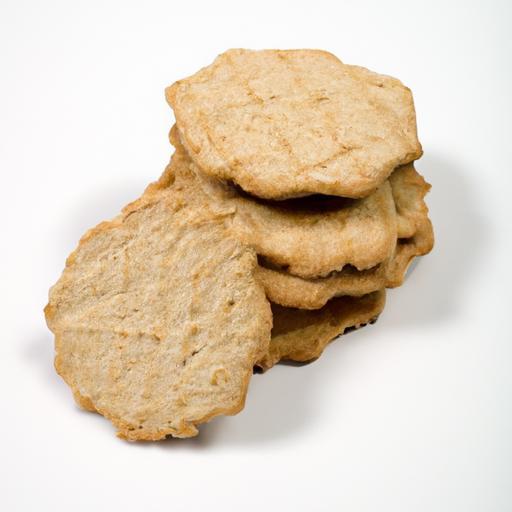
Q6: What’s the best way to store gluten-free biscuits to maintain their crispness?
A6: Let biscuits cool completely before storing to prevent steam buildup. Store them in an airtight container at room temperature for up to two days. To revive crispness, pop them in a 350°F (175°C) oven for 5-7 minutes before serving.
Q7: Can gluten-free biscuits be made ahead of time?
A7: Yes! You can prepare the dough in advance and refrigerate it for up to 24 hours or freeze formed biscuits before baking. Just thaw refrigerated dough before baking, or bake from frozen adding a few extra minutes to the cooking time.
Q8: Any tips for adding flavor twists to gluten-free biscuits?
A8: The sky’s the limit! Incorporate herbs like rosemary, sharp cheddar cheese, or a touch of honey for sweetness. For a savory kick, try garlic and parmesan, or for a sweet treat, add cinnamon and dried fruit. As gluten-free flours have subtle flavors, they make a fantastic canvas for creative add-ins.
Q9: Where can one find gluten-free biscuit recipes that truly deliver on texture and taste?
A9: look for recipes that emphasize flour blends, use tested leavening techniques, and include tips on dough handling. Blogs and cookbooks specializing in gluten-free baking offer treasure troves of tried-and-true recipes. Our ”Crisp & Tasty” guide curates the best techniques to help you nail the perfect biscuit every time.
Q10: Why is it worth mastering gluten-free biscuit baking?
A10: Beyond accommodating dietary needs, mastering gluten-free biscuits opens a world of appetizing possibilities. There’s immense satisfaction in creating biscuits that everyone can enjoy-crisp on the outside, tender inside-proving gluten-free doesn’t mean flavor-free or boring!
Ready to embrace crisp, tasty gluten-free biscuits? Dive into our guide, and transform your baking one biscuit at a time!
In Retrospect
Whether you’re a seasoned gluten-free baker or just beginning your journey, mastering the art of crisp and tasty gluten-free biscuits is within your reach. with the right blend of ingredients, a dash of patience, and these tried-and-true tips, you can create biscuits that not only satisfy your cravings but also bring joy to your table. Embrace the versatility and freedom that gluten-free baking offers, and remember: every biscuit you bake is a step closer to your perfect, golden-brown masterpiece. So grab your mixing bowl, preheat that oven, and let the delicious adventure begin!