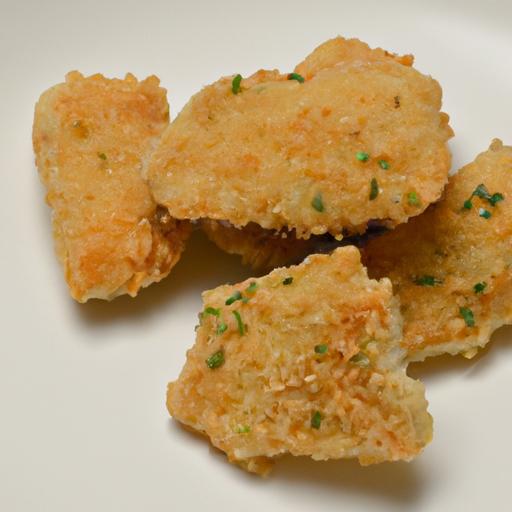
There’s something undeniably satisfying about the perfect crunch – that golden, airy crispness that turns an ordinary dish into an unforgettable delight. Enter panko breadcrumbs: the secret weapon behind the irresistible crunch of your favorite fried foods, from tempura to crispy chicken cutlets. But what if you could skip the store-bought bag and create your own homemade panko, tailored to your exact texture and freshness desires? In this article, we’ll unravel the art of making crispy perfection right in your kitchen, revealing how simple techniques can transform everyday bread into those light, flaky breadcrumbs that elevate every bite. Get ready to crunch your way to culinary bliss with a homemade twist on a beloved classic.
Crispy Perfection starts with choosing the ideal bread to craft that unmistakable airy texture and golden crunch of homemade panko breadcrumbs. This Japanese pantry essential owes its delicate flakiness to the bread’s unique structure and the subtle drying process that follows. Understanding how to select the right bread, master drying techniques, and store your panko correctly will elevate every crispy dish you create, from tempura to baked coatings.
Choosing the Right Bread for Ultimate Crunch
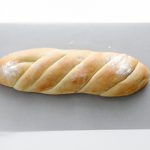
The secret to achieving that iconic light and fluffy panko texture lies primarily in your bread choice.Traditional panko is made from white bread without crusts, featuring a soft crumb and large air pockets. For homemade panko, opt for a plain, unsliced white sandwich bread or a bakery loaf with minimal preservatives and no added seeds or whole grains to avoid dense crumbs.
The absence of crust is crucial – the crust creates darker, heavier crumbs that produce less of that signature crunch and fluff. If you only have regular bread with crusts,trimming them away before processing will help attain the right texture.
For a slightly healthier twist, you can experiment with milk bread or japanese shokupan, which impart a richer flavor while maintaining the panko’s ideal structure.Avoid sourdough or artisan breads as their dense crumb creates small, compact crumbs that lack crunch.
Techniques to Achieve Light and Fluffy Panko Texture
After selecting the right bread, the technique to transform it into fluffy crumbs is surprisingly simple but must be done with care. Tear or pulse the crumb gently in a food processor rather than chopping aggressively. Light, airy flakes form when the bread crumb is broken just enough without over-processing into dense powder.
For an even coarser texture, you can pulse in short bursts or use large holes of a box grater to shred the bread manually. This mimics the traditional panko’s broad flakes.
To boost airiness, its best to start with fresh bread at room temperature. if your loaf is too fresh and soft, letting it sit uncovered for an hour or two helps reduce moisture slightly before pulsing.
Perfecting the Drying Process for Crispy Results
Drying your homemade panko properly is the keystone for achieving scene-stealing crispness. Unlike store-bought crumbs, homemade panko must be dried carefully at a low temperature to preserve its light texture while removing moisture.
- Spread crumbs evenly on a parchment-lined baking sheet to allow consistent airflow.
- Set your oven to 250°F (120°C) and bake for 20-30 minutes. Stir gently every 10 minutes to avoid browning and ensure even drying.
- Keep a close eye toward the end; the crumbs should be dry but not golden brown or toasted.
- For an extra crispy finish, you may air-dry the crumbs for an additional hour at room temperature after baking.
Store-bought panko frequently enough undergoes specialized baking processes that yield crispiness without toasting; this gentle method mimics that delicate balance beautifully.
Storage tips to Keep Your Panko Fresh and Crunchy
To maintain the hallmark crunch and freshness of your homemade panko, proper storage is essential. Excess moisture will compromise texture rapidly, so use an airtight container stored in a cool, dry place.
- For short-term use (up to 2 weeks), keep panko at room temperature in a glass jar with a sealed lid.
- For longer storage, refrigerate panko in a sealed container or vacuum bag to prevent staleness and absorb odors.
- Freeze panko for up to 3 months, separating portions into resealable bags. Thaw at room temperature before use, and re-bake quickly in a low oven if crumbs feel soft.
Labeling your container with the drying date helps you keep track of peak freshness for optimal crispy perfection.
prep and cook Time
- Prep: 10 minutes (includes bread trimming and pulsing)
- Drying: 30 minutes baking + optional 1 hour air-dry
- Total Time: Approximately 1 hour 40 minutes
Yield
About 1.5 cups of homemade panko breadcrumbs from one standard 12-ounce loaf of white bread.
Difficulty Level
Easy: Perfect for cooks of all skill levels seeking a fun, hands-on DIY pantry upgrade.
Ingredients
- 1 loaf (12 oz) white sandwich bread, crusts removed
- Optional: 1 tsp cornstarch (to improve flake separation, optional)
Instructions
- Preheat your oven to 250°F (120°C).
- Trim away all crusts from the bread to ensure fluffy white crumbs.
- Tear the bread into medium chunks and place them in a food processor.
- Pulse the bread in short bursts until you achieve coarse flakes, avoiding over-processing into powder. Stop frequently to check texture.
- Spread the crumbs in an even layer on a parchment-lined baking sheet.
- Bake in the oven for 20-30 minutes, stirring every 10 minutes to dry crumbs evenly without browning.
- remove when crumbs feel dry and light but not toasted.
- Let the crumbs cool and air dry for 1 hour if time allows, enhancing crispness.
- Store cooled panko in an airtight container.
Tips for success
- Timing is key: Avoid baking too long to prevent toasty flavor that differs from traditional panko.
- For gluten-free: Use gluten-free white sandwich bread with a similar texture, but expect slight variations.
- Freeze leftovers: Keeps crumbs fresher longer and ready to crisp up on demand.
- Add seasoning: Mix in garlic powder, smoked paprika, or dried herbs before drying for a flavored coating option.
Serving Suggestions
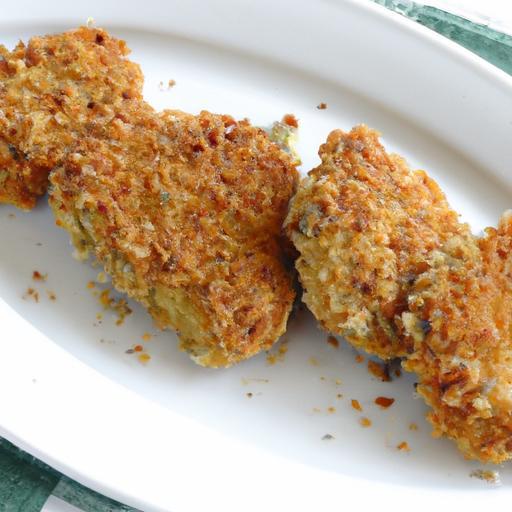
Homemade panko shines as a crunchy coating for fried chicken,crispy tofu,or a golden topping over casseroles. Garnish finished dishes with a sprinkle of fresh herbs, lemon zest, or a drizzle of sesame oil to complement the light texture.

| Nutrient | Per 1 cup (28g) |
|---|---|
| Calories | 110 |
| Protein | 3g |
| Carbohydrates | 22g |
| Fat | 0.5g |
For more tips on creating crispy coatings,visit our guide to making crispy chicken. Expand your culinary skillset with inspiration from japanese Cooking 101, a trusted authority on traditional techniques and flavors.
Q&A
Q&A: Crispy Perfection – How to Make Homemade Panko breadcrumbs
Q: What exactly are panko breadcrumbs and how do they differ from regular breadcrumbs?
A: Panko breadcrumbs are Japanese-style breadcrumbs known for their light, airy, and super-crispy texture. Unlike traditional breadcrumbs, which are often finely ground and dense, panko is made from crustless white bread shredded into large, jagged flakes. This unique texture creates an exceptionally crunchy coating that stays crisp longer and absorbs less oil.
Q: Can I make panko breadcrumbs at home, or do I have to buy them?
A: Absolutely! Making panko breadcrumbs at home is surprisingly easy and rewarding. All you need is a fresh loaf of white bread without the crusts, a food processor or even just a grater, and a dry pan or oven to toast the crumbs to golden perfection. Homemade panko can be fresher, customized in texture, and way more satisfying.Q: What type of bread works best when making homemade panko?
A: For authentic homemade panko, opt for a plain white sandwich bread with a soft, crustless crumb. The absence of crust helps create those iconic light flakes. If your bread has crusts,simply remove them before processing. Avoid breads with seeds or heavy grains, as these can alter the texture and color of the crumbs.
Q: What’s the best technique to get that flaky texture characteristic of panko?
A: The magic lies in how you break down the bread. Instead of finely grinding it like regular breadcrumbs, pulse the bread gently in a food processor to create coarse, flaky pieces. Alternatively, you can shred bread by hand using a box grater or even tear it into small flakes. The key is to preserve the light, large flakes rather than turning it into powder.
Q: How should I toast homemade panko for that perfect crunch?
A: Toasting can be done on a dry skillet over medium heat or baked in a low oven (about 300°F or 150°C) for 5-10 minutes. Stir or toss frequently to ensure even browning and prevent burning. The goal is a golden, dry crumb that’s crunchy but not browned too dark. Let them cool wholly before storing.
Q: Can I store homemade panko breadcrumbs? If so, how long do they keep?
A: Yes! Once toasted and cooled, store your homemade panko in an airtight container. Kept in a cool,dry place,they’ll stay fresh for up to two weeks. For longer storage, place them in a sealed bag in the freezer, where they can last for several months without losing their crispness.
Q: How do homemade panko breadcrumbs enhance my cooking?
A: Fall in love with how these fluffy flakes transform ordinary dishes: from crisply golden fried chicken and tempura vegetables to crunchy topping on casseroles or adding a delightful bite to meatballs. Homemade panko provides a fresh, lighter crunch compared to store-bought options, making your dishes taste elevated and irresistibly crispy.
Q: Are there any creative twists I can try with homemade panko?
A: The sky’s the limit! Mix dried herbs, parmesan cheese, or spices into your panko before toasting for a flavorful boost. Swap white bread for gluten-free or whole wheat variants for different flavors and textures. You might even experiment with adding finely chopped nuts or seeds for extra crunch and nutrition.
Q: Any final pro tips for mastering homemade panko?
A: Yes! Always start with fresh, soft bread for the lightest crumbs. Don’t over-process-pulse gently to keep flakes large and airy. Toast slowly and stir often for even color and crispness. Lastly, use homemade panko immediately after toasting for unbeatable freshness or store properly for future crispy creations.
Making your own panko breadcrumbs brings a little homemade magic to the table-and a lot of crunch to your recipes. Ready to create crispy perfection in your kitchen? Your homemade panko adventure awaits!
In Retrospect
With homemade panko breadcrumbs in your culinary arsenal, you’re no longer just following recipes-you’re crafting textures and tastes that elevate every dish. The crispy golden crunch that panko delivers can transform weeknight dinners into memorable meals, all made with simple ingredients and a touch of care. So next time you reach for that bottle of oil or whisk up a sauce, remember: the secret to crispy perfection starts with the humble homemade breadcrumb. Experiment, enjoy, and crunch on-you’ve just unlocked a new level of kitchen creativity.