
There’s a quiet kind of magic bubbling beneath the surface of every loaf of bread,every golden roll,every soft pretzel-an ancient alchemy powered by one tiny,living ingredient: yeast. Yeast dough is more than just flour and water; it’s a living canvas where science and art meet, rising slowly to create airy textures and deep, complex flavors. From the gentle fermentation that wakes dormant yeast cells to the patient kneading that strengthens gluten strands, the journey of yeast dough is a engaging transformation. in this article, we’ll uncover the enchanting secrets behind yeast’s rise, explore the layers of flavor it brings, and share essential crafting tips to help you master the dough’s subtle magic in your own kitchen.Whether you’re a curious beginner or a seasoned baker, prepare to see yeast dough in a whole new light.
Yeast dough is an alchemy of biology and culinary art,where tiny living organisms transform simple ingredients into airy,flavorful breads and pastries. Understanding yeast and its role in dough transformation empowers you to harness nature’s magic, elevating every loaf from ordinary to extraordinary. As the yeast ferments sugars, it creates carbon dioxide and alcohol, which together give your dough rise, texture, and the uniquely satisfying flavor that is unachievable to replicate with chemical leaveners.
prep and Cook Time
- Preparation: 20 minutes
- Fermentation and Rising: 1 to 3 hours (depending on dough and ambient temperature)
- Baking Time: 25 to 40 minutes
Yield
One medium-sized loaf (about 8 servings)
Difficulty Level
Medium – perfect for confident beginners ready to master yeast-based baking
Ingredients
- 3 ½ cups all-purpose flour, sifted
- 1 packet (2 ¼ tsp) active dry yeast
- 1 ¼ cups warm water (105°F to 115°F)
- 2 tbsp granulated sugar
- 2 tbsp olive oil or melted butter
- 1 ½ tsp sea salt
Instructions
- Activate the yeast: In a small bowl, combine warm water and sugar. Sprinkle the yeast over the surface and let it sit for 5-10 minutes until foamy. This bubbling signals live yeast ready to work its magic.
- Mix the dough: In a large bowl, whisk the flour and salt together. Create a well in the centre and pour in the activated yeast mixture and olive oil. Gently stir with a wooden spoon until combined into a shaggy dough.
- Knead for structure: Lightly flour your work surface and knead the dough for 8-10 minutes.Use the heel of your hand to push dough away, fold it back, and rotate. The dough shoudl become smooth,elastic,and slightly tacky but not sticky.
- First rise – fermentation: Lightly oil a clean bowl and place the dough inside, turning once to coat. Cover with a damp cloth or plastic wrap and let it rise in a warm environment 1 to 2 hours, or until doubled in size. The longer the fermentation, the deeper the flavor-consider a slow rise in the fridge overnight for complexity.
- Shape the dough: Punch down the risen dough to release gas gently, then shape it into a loaf or rolls. Place on a parchment-lined baking sheet or into a greased loaf pan.
- Second rise: Cover and allow a second proofing for 30 to 45 minutes. The dough should puff but not over-expand to ensure a fine crumb texture.
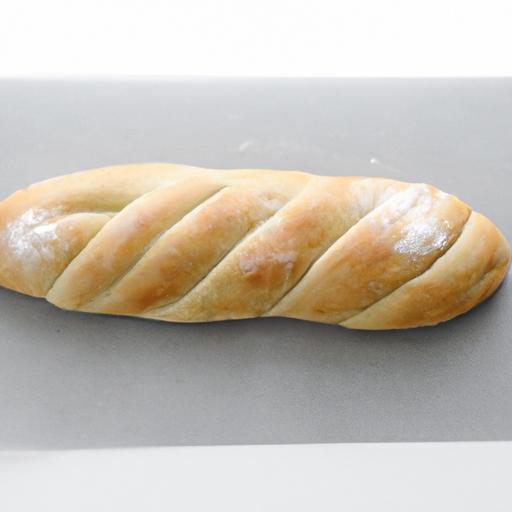
- Bake: Preheat your oven to 375°F (190°C). Optional: Lightly slash the loaf top with a sharp knife to control expansion. bake for 25-40 minutes until the crust is golden brown and taps hollow when tapped underneath.
- Cool: Transfer the bread to a wire rack to cool fully before slicing. This resting step lets the crumb finish setting, preserving a tender, moist interior.
Tips for Success
- Use precise water temperature: Too hot kills yeast; too cold slows fermentation. Aim for lukewarm.
- Experiment with fermentation time: Longer, slower rises develop honeyed, nutty flavors and subtler aromas.
- Hydration adjustment: Wetter doughs yield lighter, airier crumb but can be stickier and harder to handle.
- Keep dough covered: Prevent drying out during proofing by maintaining humidity with a damp towel or plastic wrap.
- Substitute whole wheat flour: Use up to 50% whole wheat for a heartier flavor but increase hydration slightly.
- Make ahead: Refrigerate shaped dough overnight, then bake fresh next day for convenience and enhanced taste.
Serving Suggestions
Enjoy this bread warm, slathered with herb-infused butter or drizzled with golden olive oil and flaky sea salt. Pair with aromatic cheeses, roasted garlic, or sun-dried tomato tapenade. For a dramatic presentation, garnish with fresh rosemary sprigs or edible flowers.A crusty yeast loaf also shines as a base for creative sandwiches, bruschetta, or hearty french toast with cinnamon and maple syrup.

| Nutrient | Per Serving |
|---|---|
| Calories | 185 kcal |
| Protein | 5 g |
| Carbohydrates | 35 g |
| Fat | 3 g |
For deeper insight into yeast biology and fermentation science,visit the Science Daily fermentation articles. If you want to expand your baking skills, check out our artisan bread baking guide for detailed tutorials.
Q&A
Q&A: The Magic of Yeast Dough – Rise, Flavor, and Crafting Tips
Q1: What makes yeast dough so magical compared to other types of dough?
A1: Yeast dough is more than just flour and water; it’s a living, breathing creation. The magic lies in the tiny yeast cells that feast on sugars, releasing carbon dioxide and alcohol. This bubbling fermentation causes the dough to rise,creating that airy,tender crumb we adore in breads and pastries. It’s a gorgeous chemistry dance-where biology meets culinary art,transforming basic ingredients into something wonderfully complex and flavorful.
Q2: How exactly does yeast cause dough to rise?
A2: Yeast consumes the sugars in dough and produces carbon dioxide gas as a byproduct. These gas bubbles get trapped within the gluten network-a stretchy web formed when flour proteins meet water-causing the dough to puff up like a soft balloon. This rise not onyl gives bread volume but also contributes to its light,fluffy texture. The longer and slower the fermentation, the more nuanced the rise and flavor become.
Q3: what role does fermentation play in flavor advancement?
A3: Fermentation is the unsung hero of flavor. As yeast munches away, it generates organic acids and alcohols, weaving subtle tangs and sweetness into the dough’s profile. Think of it as a slow, natural marinating process inside the dough itself. Extended fermentation-whether through a long cold proof or sourdough methods-unlocks deeper, richer tastes that can turn simple bread into a gourmet experience.
Q4: Are there tricks to crafting the perfect yeast dough?
A4: Absolutely! First, be mindful of your yeast-fresh, properly stored yeast behaves like a charm. Use lukewarm water (around 95°F or 35°C) to gently wake the yeast without shocking it. Kneading develops gluten, giving dough strength to capture gas, so don’t skimp here. Patience is key: let the dough rise until it roughly doubles in size. gentle handling preserves those precious bubbles that ensure a tender crumb.
Q5: Can I experiment with flavors in yeast dough?
A5: Definitely! Yeast dough is a versatile canvas.Add herbs,spices,cheese,or fruits directly to the dough or as fillings.Incorporate whole grains or seeds for texture and earthy notes. Even experimenting with different flours-like rye or spelt-can introduce unique taste dimensions. Just remember, add-ins can affect rise and moisture, so adjust hydration or proofing times as needed.
Q6: Why does my yeast dough sometimes fail to rise as was to be expected?
A6: Several sneaky factors could be at play. Water that’s too hot can kill yeast; too cold may put it to sleep. Old or improperly stored yeast loses its power. Over-kneading or under-kneading affects gluten structure, crucial for trapping gas. Also, dough placed in a chilly spot will ferment sluggishly. ensuring the right environment and practicing patience frequently enough solves the mystery.Q7: How important is shaping and scoring yeast dough before baking?
A7: Shaping is both functional and artful. Proper shaping creates surface tension, encouraging an even rise and a lovely crumb. Scoring-the act of slashing the dough’s surface before baking-controls expansion, prevents random bursting, and adds aesthetic flair. These cuts act like release valves, guiding the dough’s oven spring and contributing to the bread’s personality.
Q8: Any final words of wisdom for yeast dough explorers?
A8: Embrace the slow magic. Yeast dough baking is a delightful blend of science,patience,and creativity. Listen to your dough-feel its texture, watch its rise, and smell its aroma.Each batch is a journey where even little tweaks yield different results. Most importantly, have fun turning simple ingredients into something wonderfully alive and delicious!
Insights and conclusions
As the final crumb settles and the aroma lingers, the magic of yeast dough reveals itself not just in the rise or the flavor, but in the timeless craft that transforms simple ingredients into edible art. Whether you’re a curious novice or a seasoned baker, understanding the subtle dance of yeast opens a world of endless possibilities-where patience, precision, and a touch of creativity come together to create more than just bread, but moments worth savoring.So next time you blend flour with life, remember: every loaf tells a story, and with these tips in hand, you’re ready to write your own delicious chapter.