There’s something undeniably satisfying about the creamy, dreamy texture of nut butter-weather it’s drizzled over toast, swirled into smoothies, or simply savored by the spoonful. But while store-bought jars line the shelves with countless varieties, making your own nut butter at home opens up a world of rich flavors, fresh ingredients, and total control over what goes into every bite. Welcome to “Butter Up Your Nuts: A Simple Guide to Homemade Nut Butter,” where we’ll crack open the secrets to transforming humble nuts into velvety spreads that’ll elevate your snacks and inspire your kitchen creativity. Ready to blend, roast, and butter up? Let’s get started.
Choosing the Perfect Nuts for Creamy and Flavorful butter
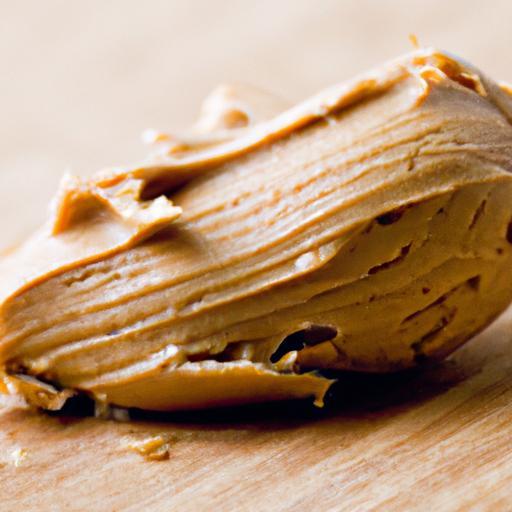
butter up your nuts with the right variety to create luscious texture and unforgettable flavor in your homemade nut butter. Each nut brings its own unique character-whether it’s the buttery smoothness of almonds, the earthy richness of cashews, or the robust, slightly sweet bite of pecans. When selecting, opt for raw or dry-roasted unsalted nuts to control the seasoning and freshness. Freshness is key here; fresher nuts mean a brighter, more vibrant butter. Avoid pre-salted or flavored nuts-they often contain oils or preservatives that can hinder your buttery masterpiece’s texture.
Mastering the Roasting Process to Elevate Your Nut butter
Roasting nuts is an essential step that unlocks their natural oils and amplifies their flavor profile. Spread your chosen nuts evenly on a baking sheet, then roast in a preheated oven at 350°F (175°C) for 10-15 minutes. Toss them once halfway through to ensure even roasting. You’ll know they’re perfectly roasted when their aroma fills your kitchen and their color deepens to a golden brown. Be vigilant; nuts can quickly go from toasted perfection to burnt bitterness in seconds. This crucial roasting step transforms simple nuts into a decadent butter bursting with a warm, toasty essence.
Blending Techniques for Smooth Texture and Rich Taste
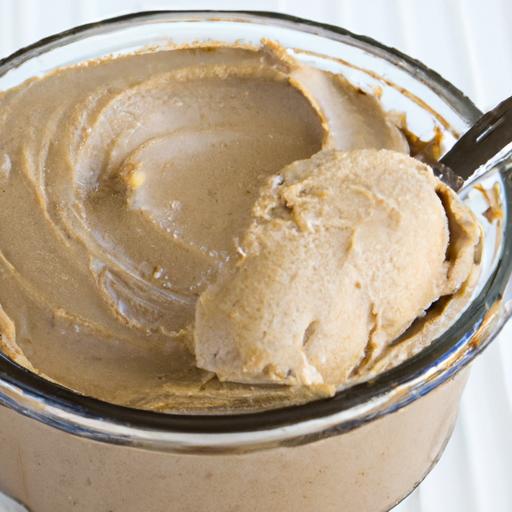
The magic of creamy nut butter lies in patient blending. Use a high-powered food processor or blender, starting with your roasted nuts. Begin pulsing intermittently to break them down into smaller pieces, then switch to continuous blending. Expect a gradual transformation-crumbly chunks will turn into a gritty paste, then into a smooth, glossy butter as the oils release.To achieve a luxuriously silky texture, scrape down the bowl frequently and blend for 8-12 minutes. For an extra luscious mouthfeel,add a teaspoon of neutral oil,like grapeseed or light olive oil,but only if needed. Resist the urge to over-process; you want a loadable, not runny texture.
Flavor Boosters and Storage Tips to Keep Your Nut Butter fresh
Elevate your nut butter effortlessly with simple flavor boosters: a pinch of sea salt enhances depth, a drizzle of honey or maple syrup adds gentle sweetness, or a dusting of cinnamon or vanilla extract introduces warmth and complexity. Feel free to experiment with subtle infusions like smoked paprika or cocoa powder for a gourmet twist. Once your butter hits perfection,store it in an airtight container in the refrigerator to preserve freshness and prevent oil separation. Stir before each use to reunite the natural oils that settle over time. Properly stored, your nut butter stays luscious and ready for weeks, making every spoonful a flavorful delight.
Prep and Cook Time
- Planning: 10 minutes
- Roasting: 10-15 minutes
- Blending: 10-12 minutes
- total Time: 30-40 minutes
Yield
Approximately 1 cup (8 oz) of homemade nut butter
Difficulty Level
Easy to Medium – Ideal for home cooks seeking satisfying, customizable spreads
Ingredients
- 2 cups raw or dry-roasted nuts (almonds, cashews, pecans, or mixed)
- optional: 1 teaspoon neutral oil (grapeseed, light olive)
- 1/4 teaspoon sea salt (adjust to taste)
- Optional flavor boosters: 1 teaspoon honey, maple syrup, or vanilla extract; pinch of cinnamon or smoked paprika
Instructions
- Preheat your oven to 350°F (175°C). Spread nuts evenly on a parchment-lined baking sheet in a single layer.
- Roast nuts for 10-15 minutes, tossing them halfway through for even browning. Watch closely to avoid burning-nuts should be golden and fragrant.
- Transfer warm nuts instantly to your food processor. pulse a few times to break them down into coarse crumbs.
- Process continuously, pausing every 1-2 minutes to scrape down the bowl. Initially, the nuts will clump, then slowly release oils, creating a gritty paste, eventually smoothing into creamy butter.This should take about 8-12 minutes total.
- add oil and salt once the mixture looks creamy but dry; continue blending to incorporate fully.
- Add any optional flavor boosters and pulse briefly to combine.
- transfer nut butter to a clean jar or airtight container.Let it cool before sealing.
- Store in the refrigerator. Stir before each use to mix separated oils.
Chef’s Notes
- Roast freshly for best flavor: Avoid nuts older than 3 months for optimum taste.
- Oil addition: Use sparingly to avoid overly runny butter.
- Make-ahead: Nut butter can be stored refrigerated for up to 3 weeks or frozen for 3 months.
- Allergy-pleasant: Substitute any nut with seeds like pumpkin or sunflower for a different but equally rich butter.
- Food processor tip: Patience is key. Allow periodic rests to prevent overheating your motor.
Serving Suggestions
Spread your homemade nut butter thickly on warm toast or swirl it into oatmeal for a decadent breakfast.Dollop onto smoothie bowls,pair with fresh fruit,or use as a dip for crunchy celery sticks. Garnish with a sprinkle of coarse sea salt, a drizzle of honey, or crushed nuts for texture contrast-each bite a delightful balance of creamy and crunchy satisfaction.
| Nutritional Info (per 2 tbsp) | calories | Protein | Carbs | Fat |
|---|---|---|---|---|
| Almond Butter | 190 | 6g | 6g | 16g |
| Cashew Butter | 180 | 5g | 9g | 14g |
| Pecan butter | 200 | 3g | 4g | 20g |

For more inspiration on homemade spreads and dips, check out our homemade spreads guide. Expand your culinary horizons with expert tips from The Academy of Nutrition and Dietetics to learn more about the health benefits of nuts and nut butters.
Q&A
Q&A: Butter Up Your Nuts – A Simple Guide to Homemade Nut Butter
Q1: Why should I make my own nut butter instead of buying it?
A1: Homemade nut butter is like the superhero version of store-bought jars-no sneaky additives, no mysterious oils, just pure nutty goodness. Plus, you control the texture, flavor, and ingredients, making it as creamy, crunchy, or adventurous as your taste buds desire. Bonus: it’s often cheaper and fresher!
Q2: What nuts are best for homemade nut butter?
A2: The world is your oyster-err, nut bowl! Almonds, peanuts, cashews, hazelnuts, pecans, walnuts, or even macadamias all make fantastic butters. Each nut brings a unique flavor and texture. Such as, cashews yield a silky smooth spread, while almonds offer a robust, slightly earthy bite.Q3: What equipment do I need to make nut butter at home?
A3: Just a good food processor or a high-powered blender will do the trick. A sturdy spoon or spatula helps for scraping down the sides, and an airtight jar is perfect for storing your buttery creation. Patience is your secret weapon here-the nuts will transform from crumbs to creamy in minutes!
Q4: Do I need to roast the nuts first?
A4: Roasting is the magic that unlocks rich,toasted flavors and helps release the oils for that velvety texture. While you can go raw for a milder taste, a fast roast in the oven at 350°F (175°C) for 10-15 minutes usually elevates the flavor and speeds up the blending process.
Q5: How long does it take to make nut butter?
A5: From start to finish? about 15-20 minutes. Blending alone can take 8 to 12 minutes,depending on your machine and desired consistency. Don’t rush-your nut butter is on a slow and steady journey from crumbly to creamy perfection.
Q6: Can I add flavors or sweeteners?
A6: Absolutely! Add a pinch of salt to bring out the nutty notes, a drizzle of honey or maple syrup for natural sweetness, or sprinkle in cinnamon, cocoa powder, or even a dash of chili for a spicy kick. Your homemade nut butter is your blank canvas-get creative!
Q7: How do I store homemade nut butter?
A7: Pop it in an airtight container and store it in the fridge or a cool pantry. Because it’s preservative-free, it’s best enjoyed within 2-3 weeks. if the oils separate, just give it a good stir to re-mix those luscious layers.
Q8: Any tips for getting the perfect creamy texture?
A8: Patience and power! Blend in bursts, scraping the sides often. If your processor struggles, add a small spoonful of neutral oil (like avocado or light olive oil) to coax the butter toward that silky dream. also, don’t skimp on roasting-properly toasted nuts blend more smoothly.
Q9: Is homemade nut butter healthy?
A9: You bet. Nut butters are packed with heart-healthy fats, protein, fiber, and essential vitamins and minerals. When you make it yourself,you avoid added sugars and harmful oils,so it’s a clean,wholesome boost for your diet.Q10: Can I use this guide for seed butters too?
A10: Definitely! Sunflower seeds, pumpkin seeds, or even sesame seeds (hello, homemade tahini) can be transformed into delicious butters using the same principles. Just adjust roasting times and blending times since seeds are smaller and sometiems more delicate.
Now that you’ve got the answers, it’s time to butter up your nuts and dive into the creamy, dreamy world of homemade nut butter artistry!
The Conclusion
Whether you’re spreading it on toast, blending it into smoothies, or simply savoring it by the spoonful, homemade nut butter is more than just a tasty treat-it’s a wholesome delight crafted by your own hands. Armed with simple ingredients and a bit of patience, you can transform everyday nuts into creamy, luscious spreads tailored to your taste buds. So go ahead, butter up your nuts and elevate your snacking game-as when it comes to nut butter, homemade truly means heart-made.Happy blending!