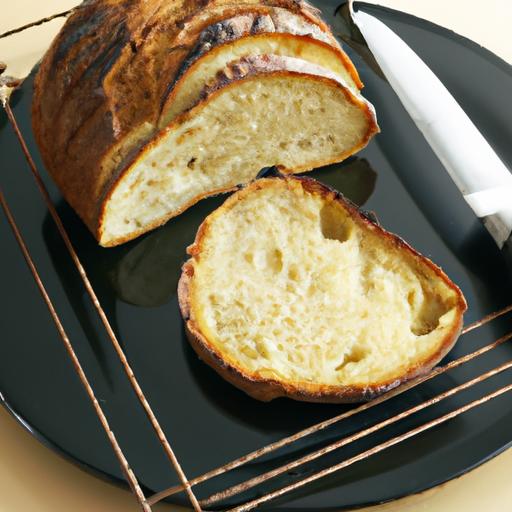
there’s an art to sourdough that has captivated bakers for centuries-the perfect balance of tangy flavor, chewy texture, and golden crust. But what happens when gluten is off the table? Enter the world of gluten-free sourdough: a realm where tradition meets innovation, and where every loaf tells a story of patience, passion, and precision. Mastering gluten-free sourdough isn’t just about swapping flours; it’s about embracing a new rhythm in fermentation, hydration, and baking techniques to create a crisp, tangy delight that rivals its classic counterpart. Join us as we unravel the secrets to this gluten-free masterpiece, transforming humble ingredients into a loaf that’s as nourishing as it is irresistible.
Understanding the Science Behind Gluten-Free Sourdough Fermentation
Mastering gluten-free sourdough begins with appreciating the intricate fermentation process that breathes life into every loaf. Unlike customary wheat sourdough, gluten-free fermentation relies on wild yeasts and beneficial bacteria thriving in option flours that lack gluten’s network. This delicate balance creates natural leavening while developing the vibrant tang and texture that make this bread irresistible.
The key to success lies in nurturing a starter culture that metabolizes sugars uniquely found in gluten-free grains. The fermentation process produces organic acids-primarily lactic and acetic acids-that impart a complex sour flavor and help preserve the crumb’s moisture. Meanwhile, hydration and fermentation time directly influence crumb openness and crust crispiness.
Selecting the Perfect Gluten-Free Flour Blends for Optimal Texture
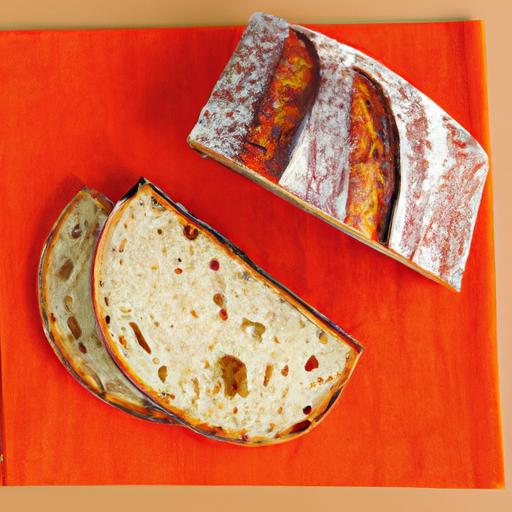
The foundation of a flawless gluten-free sourdough is the blend of flours you choose. A balanced mix combines the softness of rice flour or sorghum flour, the earthiness of buckwheat, and the binding power of tapioca starch or potato starch. These work synergistically to mimic gluten’s elasticity and create a loaf with both a chewy crumb and a crackling crust.
High-protein flours like teff or millet can enrich flavor complexity but require precise hydration adjustments.For a lighter, airier loaf, consider incorporating psyllium husk powder as a natural binder-it helps trap air, enhancing crumb structure without heaviness. Experimenting with blends tailored to your palate and local flours can elevate every bake into an artisanal masterpiece.
Crafting a Vibrant Starter Culture for a Tangy Flavor Profile
The heartbeat of any sourdough loaf is its starter culture. For gluten-free sourdough, patience and consistency are paramount. Begin with equal parts of your chosen gluten-free flour blend and filtered water, stirred and left at room temperature to encourage wild yeast and lactobacilli growth.
Feed your starter daily,discarding a portion and refreshing with fresh flour and water. Over several days to weeks, the starter will bubble vigorously, emitting a pleasantly tangy aroma-sign that it’s ready. To sharpen tanginess, allow longer fermentation or add ripe pineapple juice during feedings, as its acidity helps cultivate a lively microbial community.
Techniques to Achieve a Crispy Crust and Moist Crumb Every Time
Achieving that coveted crispy crust with a moist crumb is the crowning jewel of gluten-free sourdough mastery. Start with preheating your oven to the highest temp and using a Dutch oven or baking stone to create intense radiant heat. This rapid heat shock encourages rapid oven spring and deep crust caramelization.
Steam introduction during the first 10-15 minutes of baking is crucial; it keeps the crust supple, allowing maximal expansion before hardening. Afterward, removing the steam source lets the crust dry out and crisp to perfection. Additionally, incorporating a final fold into your dough mimics gluten’s strengthening effect, creating better gas retention and crumb openness.
Prep and Cook Time
- Starter Development: 7-14 days (active maintenance ongoing)
- Mixing and Autolyse: 30 minutes
- Bulk Fermentation: 6-8 hours (room temperature)
- Proofing: 2-3 hours or overnight in refrigerator
- baking: 45 minutes total
Yield
One 900g (2 lb) loaf, perfect for 8 hearty servings
Difficulty Level
Medium: Requires patience and attention but rewarding for all skill levels
Ingredients
- 150g brown rice flour
- 100g sorghum flour
- 50g tapioca starch
- 150g active gluten-free sourdough starter
- 300ml filtered water, room temperature
- 10g psyllium husk powder
- 10g sea salt
- 1 tbsp apple cider vinegar (optional, enhances fermentation)
Instructions
- Feed your starter 4-6 hours before mixing the dough to ensure maximum activity and bubbles visible on the surface.
- In a large bowl, combine the flours, starch, and psyllium husk powder. Slowly add the water and apple cider vinegar while stirring to create a thick batter.
- Add the active starter and mix thoroughly with a wooden spoon or dough whisk until fully incorporated. Cover with a damp towel and let rest for 30 minutes to autolyse-it improves hydration and flavor development.
- Add the sea salt after autolyse and fold the dough several times in the bowl over 5 minutes to build structure.
- Cover tightly and allow the dough to bulk ferment at room temperature for 6-8 hours, folding gently every hour to redistribute gas bubbles and strengthen the dough.
- Shape the dough into a tight round and place it in a well-floured banneton or bowl lined with parchment. Proof for 2-3 hours at room temperature or overnight in the fridge for deeper flavor.
- Preheat your oven with a Dutch oven inside at 250°C (482°F) for at least 45 minutes.
- carefully transfer the dough onto parchment and score the surface with a sharp blade to control expansion.
- place the dough into the hot Dutch oven, cover, and bake for 20 minutes with the lid on to trap steam.
- Remove the lid and bake for another 25 minutes to develop a deep golden-brown, crispy crust. Internal temperature should reach 95°C (203°F) when done.
- Cool completely on a wire rack before slicing to preserve crumb moisture.
Chef’s Notes
- Experiment with different gluten-free flour blends like teff or millet for enhanced flavor but adjust hydration accordingly.
- Psyllium husk powder is essential to increase elasticity; omit at your own risk-it dramatically impacts crumb and sliceability.
- Incorporating pineapple juice in your starter feedings fosters an acidic environment that suppresses unwanted microbes, improving starter longevity – learn more about this technique here.
- Make-ahead tip: bulk ferment dough overnight in the fridge for a hands-off day and richer flavor.
- Using a Dutch oven or baking stone can elevate crust quality, but a heavy cast-iron skillet with water for steam works as an alternative.
Serving Suggestions
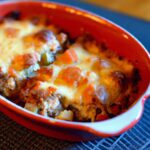
Slice your gluten-free sourdough bread thick to showcase its airy crumb and pair with velvety avocado mash, drizzled with lemon and chili flakes for a vibrant brunch. For savory options, toast and serve with herbed goat cheese and oven-roasted tomatoes. A pat of cultured butter or high-quality olive oil simply amplifies the bread’s tang and texture.
Garnish served loaves with a sprinkle of toasted sesame seeds or cracked pink peppercorns for extra visual intrigue and flavor impact.

| Nutrient | Per Slice (1/8 loaf) |
|---|---|
| Calories | 150 kcal |
| Protein | 3.5g |
| Carbohydrates | 30g |
| Fat | 1g |
For those eager to dive further into gluten-free baking, explore our detailed guide on expert gluten-free baking tips to complement your sourdough adventures.
Q&A
Q&A: Mastering Gluten-Free Sourdough – A Crisp, Tangy Delight
Q1: What makes gluten-free sourdough different from traditional sourdough?
A1: Gluten-free sourdough replaces wheat flour with gluten-free alternatives like rice, buckwheat, or sorghum flours. Unlike traditional sourdough, which relies on gluten to give structure and elasticity, gluten-free sourdough depends on clever combinations of flours, starches, and natural fermentation to achieve that signature tang and crisp crust.
Q2: Why sourdough? Isn’t gluten-free bread usually denser and less flavorful?
A2: That’s the beauty of sourdough fermentation! The natural wild yeasts and lactic acid bacteria not only lend a delightful tanginess but also enhance texture and digestibility. Gluten-free sourdough often boasts complex flavors and a light, airy crumb, defying the stereotype of dense gluten-free loaves.
Q3: How do I start a gluten-free sourdough starter?
A3: Begin with gluten-free flour (like brown rice or sorghum) and water, mixing daily to encourage wild yeast and bacteria to flourish. Patience is key: expect your starter to bubble and develop a tangy aroma within 5 to 7 days. Avoid all cross-contamination with gluten flours to keep your starter pure.
Q4: What’s the secret to that irresistibly crisp crust?
A4: Steam during baking is your best friend! Creating steam in the oven helps the loaf expand fully and forms a glossy, crackly crust. Using a baking stone or preheated cast iron can also improve heat distribution, giving your loaf that perfect crunch.
Q5: Are there any tricks to improve the texture of gluten-free sourdough?
A5: Absolutely! Adding binders like xanthan gum or psyllium husk powder mimics gluten’s elasticity, helping your loaf hold together. Also, a longer, slower fermentation allows enzymes to break down starches for a tender crumb and enhanced flavor.
Q6: Can I personalize the flavor of my gluten-free sourdough?
A6: Definitely! Experiment with different flour blends-teff, millet, or quinoa can add earthy, nutty notes. Incorporate mix-ins like seeds, herbs, or even dried fruit for unique twists. Each starter’s wild yeast community also imparts a distinct taste, making every loaf an artisanal masterpiece.Q7: How do I store gluten-free sourdough to keep it fresh and tasty?
A7: Store your loaf in a paper bag or bread box at room temperature to maintain crust crispness for 1-2 days. For longer storage, slice and freeze the bread; toast slices directly from the freezer to revive that fresh-baked crunch.
Q8: Any advice for those new to gluten-free sourdough baking?
A8: Embrace the process with curiosity and patience. Every starter is alive and unique-treat it like a beloved pet. Keep detailed notes on your flour blends, hydration levels, and timing to fine-tune your perfect loaf. Remember, gluten-free sourdough baking is both a science and an art that rewards experimentation.
Mastering gluten-free sourdough transforms simple ingredients into a crisp, tangy delight that’s as nourishing as it is delicious. Happy baking!
The Conclusion
As you embark on your journey to master gluten-free sourdough, remember that every loaf is a living testament to patience, passion, and precision. From nurturing your starter to achieving that perfect crisp crust and tangy crumb, each step unfolds the art and science behind this delightful bread. While the path may have its challenges, the reward is a deeply satisfying homemade creation that welcomes both the adventurous baker and the gluten-sensitive alike. So, dust off your flour, embrace the wild yeast, and let your kitchen fill with the inviting aroma of a truly remarkable gluten-free sourdough-where crisp meets tang in every unforgettable bite.