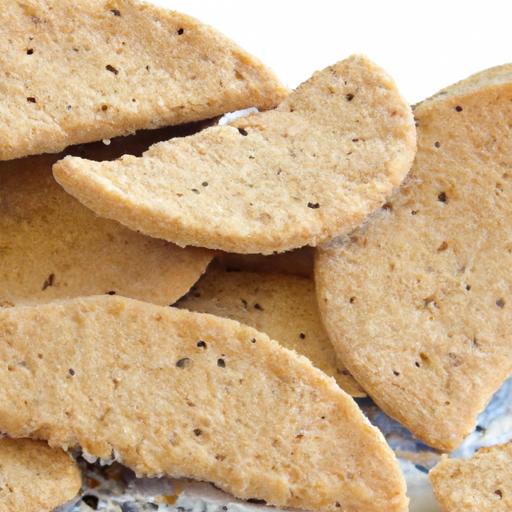
There’s a certain magic in the satisfying snap of a perfectly baked cracker-a simple pleasure that’s both crunchy and comforting. But for those navigating the world of gluten-free living, finding easy, delicious crackers that deliver on texture and taste can feel like a quirky quest. Enter “Crunchy & Simple: your Guide to Easy Gluten-Free Crackers,” were we crack open the secrets to homemade snacks that are as straightforward as they are scrumptious. Whether you’re a seasoned kitchen adventurer or a newbie eager to ditch store-bought options, this guide will inspire you to create wholesome, crisp crackers that pair beautifully with your favorite dips, cheeses, and spreads-all without a hint of gluten. Get ready to transform humble ingredients into crunchy masterpieces, proving that simplicity and gluten-free indulgence can easily go hand in hand.
Crunchy gluten-free crackers begin with selecting ingredients that promise both impeccable texture and irresistible flavor. Embracing alternatives to customary wheat-based flours is key, as the right combination yields crackers that are not only crisp but tender enough to melt in your mouth. Achieving this balance elevates simple snacks into gourmet experiences, perfect for sharing or savoring solo.
Prep and Cook Time
Readiness: 15 minutes
Cooking: 20 minutes
Total Time: 35 minutes
yield
Approximately 30 to 35 crackers, serving 4 to 6 people
Difficulty Level
Easy – perfect for bakers of all skill levels eager to explore gluten-free delights
Ingredients
- 1 cup almond flour, finely ground
- 1/2 cup tapioca starch, for crispiness
- 1/4 cup gluten-free oat flour, light and tender
- 1 teaspoon baking powder, gluten-free
- 1/2 teaspoon fine sea salt
- 2 tablespoons olive oil, extra virgin for richness
- 1/3 cup cold water, adjusted as needed
- Optional: 1 teaspoon fresh rosemary or dried herbs for aromatic flair
- Optional: 1 teaspoon smoked paprika or chili flakes to add a spicy kick
Instructions
- Preheat your oven to 350°F (175°C) and line a baking sheet with parchment paper for effortless release.
- In a large bowl, combine almond flour, tapioca starch, oat flour, baking powder, and salt. Whisk briefly to ensure even distribution of dry ingredients.
- Add the olive oil and stir with a fork until the mixture resembles coarse crumbs,which helps achieve a crumbly yet pliable dough.
- Pour in cold water gradually, mixing continually with your hands or a spatula until a soft dough forms. If too sticky, add a teaspoon more oat flour; if too dry, splash another bit of water.
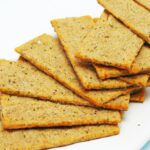
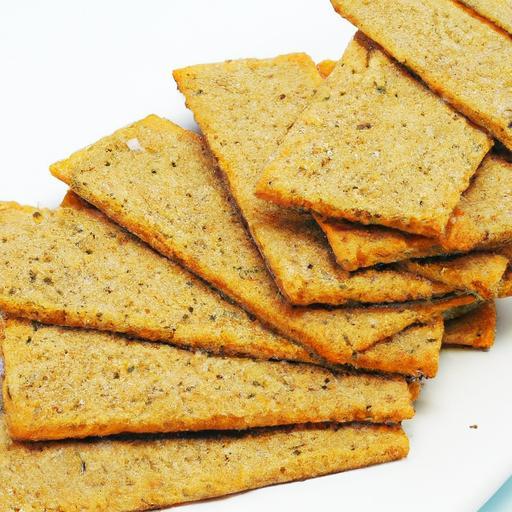
- Lightly flour your working surface with oat flour and place the dough on it. Roll out the dough with a rolling pin to about 1/8 inch thickness – the thinner the dough, the crispier the crackers.
- Using a pizza cutter or sharp knife, cut the dough into desired shapes (squares or rectangles work great). Transfer these carefully to the prepared baking sheet, spacing them slightly apart.
- If using herbs or spices like rosemary or smoked paprika, sprinkle over the top and gently press into the dough for added flavor and visual appeal.
- Bake for 18-20 minutes until edges are golden and centers firm. Keep a close eye in the last 5 minutes to prevent burning – these beauties turn from perfect to overdone quickly!
- Remove from oven and cool wholly on a wire rack to lock in crispness before serving or storing.
Tips for Success: Mastering the Art of Texture and Flavor
- Choosing flours: Almond flour imparts a rich, slightly nutty flavor, while tapioca starch is the secret to light, wonderfully crunchy crackers. Oat flour balances tenderness. You can experiment with sorghum or chickpea flour for subtle taste shifts.
- Rolling thin: Achieve optimal crispness by rolling your dough as thin as possible; 1/8 inch is a benchmark to strive for.
- Flavor boosters: Toasted sesame seeds,cracked black pepper,or a dusting of smoked sea salt add dimension and unexpected gourmet appeal.
- Make-ahead: These crackers keep well in an airtight container at room temperature for up to a week, or frozen for extended storage.
- Humidity warnings: Avoid storing in humid environments to preserve crunch-pop them briefly in a low-temperature oven for 5 minutes if they soften.
Serving Suggestions
Present your crackers alongside vibrant dips like whipped goat cheese with honey, roasted red pepper hummus, or an herby avocado salsa. Garnish with fresh thyme sprigs or edible flowers to add a picturesque touch. They also pair wonderfully with charcuterie boards, allowing these crunchy gluten-free crackers to shine as scrumptious vessels for cheeses, cured meats, and fig spreads.

| Nutrient | per Serving (5 crackers) |
|---|---|
| Calories | 110 |
| Protein | 3 g |
| Carbohydrates | 7 g |
| Fat | 8 g |
For more gluten-free baking inspiration, check out our detailed guide on Gluten-Free Bread Recipes That Rise Perfectly Every Time. To understand the science behind gluten-free starches, visit Celiac Disease Foundation for expert insights.
Q&A
Q&A: Crunchy & Simple – Your Guide to Easy Gluten-Free Crackers
Q1: Why choose gluten-free crackers over traditional ones?
A1: Gluten-free crackers cater to those with gluten sensitivities, celiac disease, or anyone seeking a lighter, often more wholesome snack. They offer the same satisfying crunch without the gluten, making snack time worry-free and delicious.
Q2: What makes gluten-free crackers “easy” to make at home?
A2: Many gluten-free cracker recipes use pantry staples like almond flour, rice flour, or chickpea flour, combined with simple seasonings and olive oil. With minimal ingredients and straightforward steps-mix, roll, cut, bake-you can have fresh, crispy crackers in under an hour.
Q3: Can you recommend a simple gluten-free cracker recipe for beginners?
A3: Absolutely! A beginner-amiable recipe might include almond flour, a pinch of salt, baking powder, an egg, and olive oil. Mix into a dough, roll thin, score into squares, and bake until golden. Customize with herbs like rosemary or garlic powder for extra flavor.
Q4: How can I ensure my gluten-free crackers come out crunchy and not crumbly?
A4: The key is balance-enough fat to bind, but not too much moisture. Roll the dough thinly and evenly, and don’t skip the pre-baking chill if the recipe calls for it. Baking at a moderate temperature allows the crackers to dry out perfectly, giving you that ideal crunch.
Q5: What are some creative flavor variations to try?
A5: The possibilities are endless! Experiment with seeds (sesame, flax, chia) for texture and nutrition. Sprinkle nutritional yeast for a cheesy twist, smoked paprika for warmth, or citrus zest for a refreshing zing. Sweet versions? Think cinnamon and a touch of honey.
Q6: Are store-bought gluten-free crackers a good option?
A6: Definitely! Many brands now offer delicious, clean-label options that are convenient for on-the-go snacking. Just check the ingredient list for added sugars or artificial additives to keep things simple and wholesome.
Q7: How can gluten-free crackers be incorporated into everyday meals?
A7: they’re incredibly versatile! Use crackers as a base for dips, cheeses, or spreads. Crush them as a crunchy topping for salads or soups.Or simply enjoy them straight up for a quick, satisfying snack anytime.Q8: What’s the best way to store homemade gluten-free crackers?
A8: Keep them in an airtight container at room temperature, away from humidity. They generally stay fresh and crisp for up to a week-if they last that long!
With this guide, your journey to crunchy, simple gluten-free crackers is just a recipe away. Ready to crunch?
In Summary
Whether you’re a seasoned gluten-free pro or just beginning your journey, crafting crunchy, simple gluten-free crackers at home is a rewarding way to elevate your snacks. With just a handful of wholesome ingredients and a bit of creativity, you can enjoy flavorful, guilt-free bites anytime. So next time hunger strikes, skip the store-bought options loaded with preservatives and embrace the satisfying crunch of homemade crackers tailored perfectly to your taste and dietary needs. Happy baking and even happier snacking!